 Loading... Please wait...
Categories
Our Newsletter
- Home
- Linux Tutorials
- Kali For Raspberry Pi Setup
Kali For Raspberry Pi Setup
Getting Started with Kali Linux on Raspberry Pi
No matter how you did the installation on the SD card, you are now ready to start Kali Linux for the first time on your Raspberry Pi.
First Boot on Kali Linux
Just insert the SD card into your Raspberry Pi and power it on.
Give it a few minutes to run some setup tasks the first time you boot.
Kali Linux will start directly with the login screen.
No questions or anything, insert, start, and wait.
There is nothing else to do.
Open a Session on Kali Linux
Once Kali has started, you need to log in:

username = kali
password = kali
Warning: the default keyboard is set to en-US, which mean you may need to type something like “kqli” if you use a different layout (like I do).
You are now on the Kali Linux Desktop, and we can move to the configuration.

You can change it by opening a terminal and typing the command:passwd
Keyboard Layout
If you don’t use a US keyboard, you can change it in the main menu > Settings > Keyboard.
- Go to the “Layout” tab and disable the system defaults.
- Add your custom layout.
- Set it by default (or remove the US layout).
But be careful, on the login screen you will keep the US layout for the moment, so choose your password knowing this.
Connect to your Network (DHCP)
Follow this part only if there is a DHCP server on your network.
If not, or if you need to set a static IP address, look at the next section.
Ethernet:
If you can connect to an Ethernet network, it’s the easiest solution: simply connect the RJ45 cable to your Raspberry Pi and wait a few seconds for an IP address to be assigned to it, there is nothing else to do.
Wi-Fi:
The Raspberry Pi Wi-Fi card is supported natively, so connection to a wireless network shouldn’t be complicated either.
On the Kali desktop, click on the network icon at the top right, and choose the SSID of your Wi-Fi network.
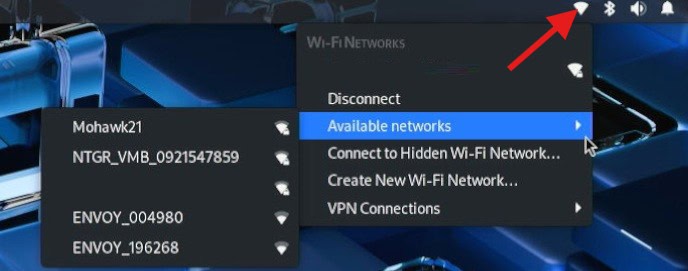
Type the password of your access point, and wait a few moments to be connected.